When it comes to version control settings in SharePoint, there are several best practices that can help you configure your system effectively and make the most of its features.
To enhance the core SharePoint versioning history features, check out the following custom developed SharePoint web parts and then read more about version configuration best practices and features below.
Version History Manager Web Part
The Version History web part displays all versions of a file.

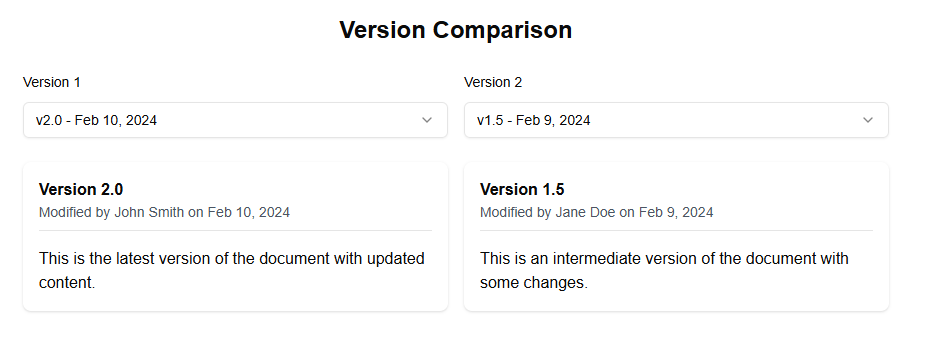
Version Comparison Web Part
The Version Comparison web part allows you to compare two versions of a document.
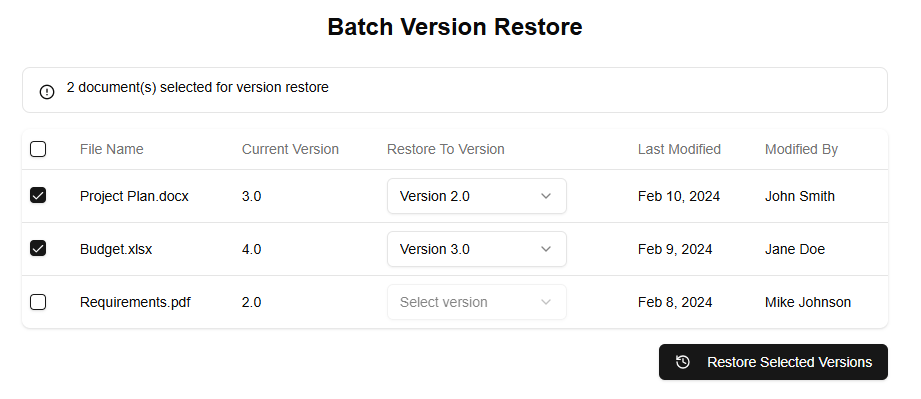
Version Batch Operations Web Part
The Batch Version Restore web part allows you to restore multiple files to previous versions at once.
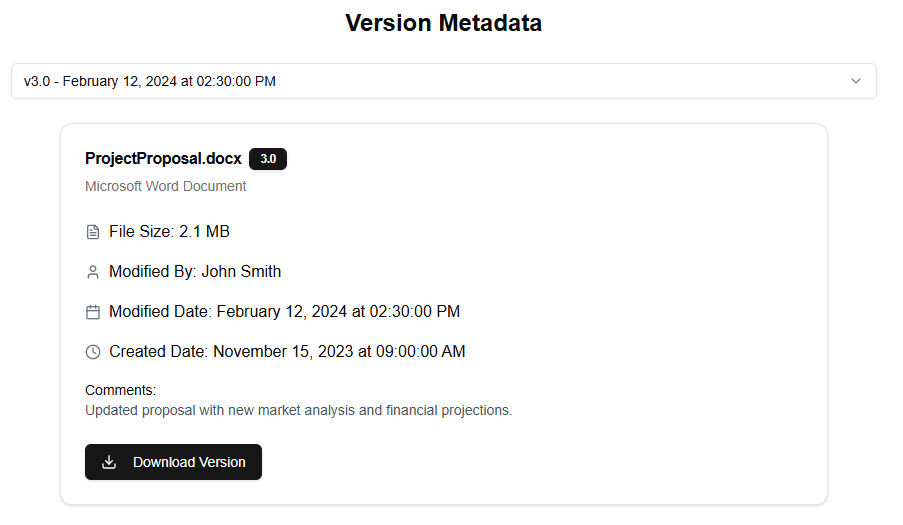
Version Detailed Metadata Web Part
The Version Detailed Metadata web part displays detailed information about a specific version of a file.
Configure Version Control Settings
The first step in configuring version control settings is to enable versioning on your SharePoint site. This can be done by going to the Site Settings page and clicking on the “Versioning” option under the “General” section. From here, you can toggle the switch to enable versioning for the site.
Once versioning is enabled, you can configure other settings such as the number of versions to keep and the retention period for older versions. These settings can be found in the same “Versioning” page, under the “Settings” tab.
Use Version History Feature
One of the most useful features of SharePoint’s version control system is the Version History feature. This feature allows you to view a history of all changes made to a document or file, including who made the change and when it was made.
To access the Version History feature, go to the document library where your file is located and click on the “File” tab at the top of the page. Then, select “Version History” from the drop-down menu. From here, you can view all versions of the file that have been created, as well as compare different versions side by side.
Use Check-Out Feature
Another useful feature of SharePoint’s version control system is the Check-Out feature. This feature allows you to lock a document or file for editing, preventing others from making changes until you are finished.
To use the Check-Out feature, go to the document library where your file is located and click on the “File” tab at the top of the page. Then, select “Check-Out” from the drop-down menu. From here, you can choose to check out a specific version of the file or all versions.
Use Auditing Feature
The auditing feature in SharePoint’s version control system allows you to track changes made to your files and documents over time. This feature is useful for tracking who made changes to a file and when they were made, as well as what changes were made.
To access the auditing feature, go to the document library where your file is located and click on the “File” tab at the top of the page. Then, select “Auditing” from the drop-down menu. From here, you can view a history of all changes made to the file, including who made the change and when it was made.
Best Practices for Configuration
When configuring version control settings in SharePoint, there are several best practices that you should keep in mind. Here are a few:
- Enable versioning: This is the most important step in configuring version control settings in SharePoint. Without versioning enabled, you will not be able to track changes made to your files and documents over time.
- Set retention period: You should set a retention period for older versions of your files and documents that are no longer needed. This will help keep your document library organized and prevent it from becoming cluttered with unnecessary versions.
- Use check-out feature: The Check-Out feature is useful for preventing others from making changes to a file while you are editing it. You should use this feature whenever possible to ensure that changes made to files are intentional and not accidental.
- Use auditing feature: The auditing feature is useful for tracking changes made to your files and documents over time. You should use this feature whenever possible to keep track of who made changes to a file and when they were made.
By following these best practices, you can ensure that your version control settings are configured effectively and that you are able to make the most of SharePoint’s features for tracking changes made to your files and documents over time.